Dans cet article nous allons voir comment créer un placeholder animé qui sera affiché durant le chargement des données comme le fait Facebook dans son application.
Commençons par créer un nouveau projet et initialiser la structure des dossiers.
react-native init ReactNativeFbLikeLoader
cd ReactNativeFbLikeLoader
mkdir src
cd src && touch index.js
mkdir components
Remplacez ensuite le code des fichiers index.ios.js et index.android.js par le code suivant :
/**
 * Sample React Native App
 * https://github.com/facebook/react-native
 * @flow
 */
import { AppRegistry } from 'react-native'
import App from './src/index'

AppRegistry.registerComponent('ReactNativeFbLikeLoader', () => App)
Pour la réalisation de ce composant nous allons avoir besoin de la librairie react-native-linear-gradient.
yarn add react-native-linear-gradient
react-native link
Maintenant que le projet est initialisé correctement nous allons pouvoir commencer.
Dans le dossier components créez un fichier ContentPlaceHolder.js et ajoutez le code suivant :
import React, { Component } from 'react'
import { AppRegistry, StyleSheet, Text, View } from 'react-native'

export default class ContentPlaceHolder extends Component {
  constructor() {
    super()
  }

  render() {
    return <View style={styles.wrapper} />
  }
}

const styles = StyleSheet.create({
  wrapper: {
    height: 160,
    borderWidth: 1,
    borderRadius: 3,
    borderColor: '#dfe0e4',
    backgroundColor: '#fff',
    padding: 12,
    marginBottom: 12,
  },
})
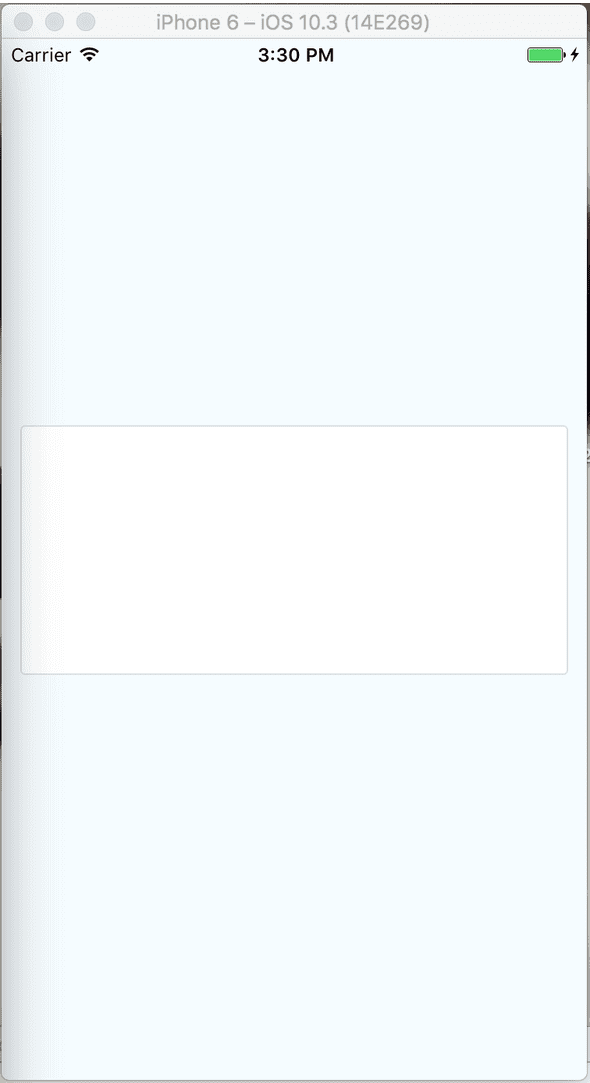
Ici nous définissons juste une vue qui représente le conteneur d’un status Facebook par exemple.
Ensuite afin de visualiser le résultat ajoutez le code suivant dans le fichier index.js.
import React, { Component } from 'react'
import { AppRegistry, StyleSheet, Text, View } from 'react-native'

import ContentPlaceHolder from './components/ContentPlaceHolder'

export default class ReactNativeFbLikeLoader extends Component {
  render() {
    return (
      <View style={styles.container}>
        <ContentPlaceHolder />
      </View>
    )
  }
}

const styles = StyleSheet.create({
  container: {
    flex: 1,
    justifyContent: 'center',
    backgroundColor: '#F5FCFF',
    padding: 12,
  },
})
Vous devriez obtenir ce résultat :
Ensuite pour obtenir un résultat similaire à celui de l’animation du placeholder de Facebook nous allons ajouter une vue avec un background gris et une autre vue avec un dégradé qui se déplacera de gauche à droite. Enfin nous ajouterons des vues qui elles auront un background blanc afin d’obtenir les différents rectangle représentant le contenu du post.
Commençons par ajouter la vue avec le background gris.
ContentPlaceHolder.js
export default class ContentPlaceHolder extends Component {
  constructor() {
    super()
    this.state = {
      width: 0,
    }
  }

  _onLayout(event) {
    var { width } = event.nativeEvent.layout
    this.setState({
      width: width,
    })
  }

  render() {
    return (
      <View style={styles.wrapper}>
        <View
          style={styles.background}
          onLayout={event => {
            this._onLayout(event)
          }}
        />
      </View>
    )
  }
}

const styles = StyleSheet.create({
  wrapper: {
    height: 160,
    borderWidth: 1,
    borderRadius: 3,
    borderColor: '#dfe0e4',
    backgroundColor: '#fff',
    padding: 12,
    marginBottom: 12,
  },
  background: {
    backgroundColor: '#f6f7f8',
  },
})
Ici nous commençons par ajouter la variable width dans l’état de notre composant. Ensuite la méthode _onLayout nous permet de récupérer et définir la valeur de width avec la largeur de la vue. La variable width nous servira par la suite pour animer la vue avec le dégradé. Enfin nous ajoutons la vue et son style au composant.
Nous allons maintenant ajouter la vue animée avec le dégradé.
ContentPlaceHolder.js
import React, { Component } from 'react'
import { AppRegistry, StyleSheet, Text, View, Animated, Easing } from 'react-native'

import LinearGradient from 'react-native-linear-gradient'

const gradientWidth = 75

export default class ContentPlaceHolder extends Component {
  constructor() {
    super()
    this.animatedValue = new Animated.Value(0)
    this.state = {
      width: 0,
    }
  }

  _onLayout(event) {
    var { width } = event.nativeEvent.layout
    this.setState({
      width: width,
    })
  }

  animate() {
    this.animatedValue.setValue(0)
    Animated.timing(this.animatedValue, {
      toValue: 1,
      duration: 800,
      easing: Easing.linear,
    }).start(() => this.animate())
  }

  componentDidMount() {
    this.animate()
  }

  render() {
    const marginEnd = this.state.width - gradientWidth
    const marginLeft = this.animatedValue.interpolate({
      inputRange: [0, 1],
      outputRange: [0, marginEnd],
    })

    return (
      <View style={styles.wrapper}>
        <View
          style={styles.background}
          onLayout={event => {
            this._onLayout(event)
          }}
        >
          <Animated.View style={[styles.linGradient, { marginLeft }]}>
            <LinearGradient
              start={{ x: 0, y: 0 }}
              end={{ x: 1, y: 0 }}
              colors={['#f6f7f8', '#e8e8e8', '#dddddd']}
              style={styles.linGradient}
            />
          </Animated.View>
        </View>
      </View>
    )
  }
}

const styles = StyleSheet.create({
  wrapper: {
    height: 160,
    borderWidth: 1,
    borderRadius: 3,
    borderColor: '#dfe0e4',
    backgroundColor: '#fff',
    padding: 12,
    marginBottom: 12,
  },
  background: {
    backgroundColor: '#f6f7f8',
    flex: 1,
  },
  linGradient: {
    width: gradientWidth,
    position: 'absolute',
    top: 0,
    left: 0,
    bottom: 0,
  },
})
Regardons en détail ce que nous avons fait durant cette étape.
1 . On importe Animated, Easing depuis react-native afin de pouvoir animer notre vue par la suite, on importe le composant LinearGradiant depuis la librairie react-native-linear-gradient et ensuite on définit une constante qui représente la largeur de ce composant.
2 . Dans le constructeur on déclare une nouvelle Animated.Value, ensuite on définit la méthode animate et on lance l’animation lorsque le composant est monté.
animate () {
    this.animatedValue.setValue(0)
    Animated.timing(
      this.animatedValue,
      {
        toValue: 1,
        duration: 800,
        easing: Easing.linear
      }
    ).start(() => this.animate())
  }

  componentDidMount () {
    this.animate()
  }
Dans la méthode animate on définit une nouvelle animation linéaire qui a une durée de 800ms. Dans le callback de la méthode start on rappelle la méthode animate ce qui permet d’avoir un animation infinie.
3 . On ajoute l’AnimatedView et le LinearGradiant ainsi que leurs styles au composant.
render() {

    const marginEnd = this.state.width - gradientWidth;
    const marginLeft = this.animatedValue.interpolate({
      inputRange: [0, 1],
      outputRange: [0, marginEnd]
    });

    return (
      <View style={styles.wrapper}>
        <View style={styles.background} onLayout={(event) => { this._onLayout(event) }}>
          <Animated.View style={[styles.linGradient,{marginLeft}]}>
            <LinearGradient
              start={{x: 0, y: 0}} end={{x: 1, y: 0}}
              colors={['#f6f7f8', '#e8e8e8', '#dddddd']}  style={styles.linGradient} />
          </Animated.View>
        </View>
      </View>
    );
  }
L’animation a pour but d’augmenter la propriété marginLeft jusqu’à un certain point avant de recommencer depuis 0. Pour cela on définit d’abord la valeur maximale que peut prendre la propriété celle-ci doit être égale à la largeur de la vue moins la dimension du dégradé.
Ensuite à l’aide de la méthode interpolate on définit quel doit être la valeur de la propriété marginLeft lorsque la valeur d’animatedValue vaut 1.
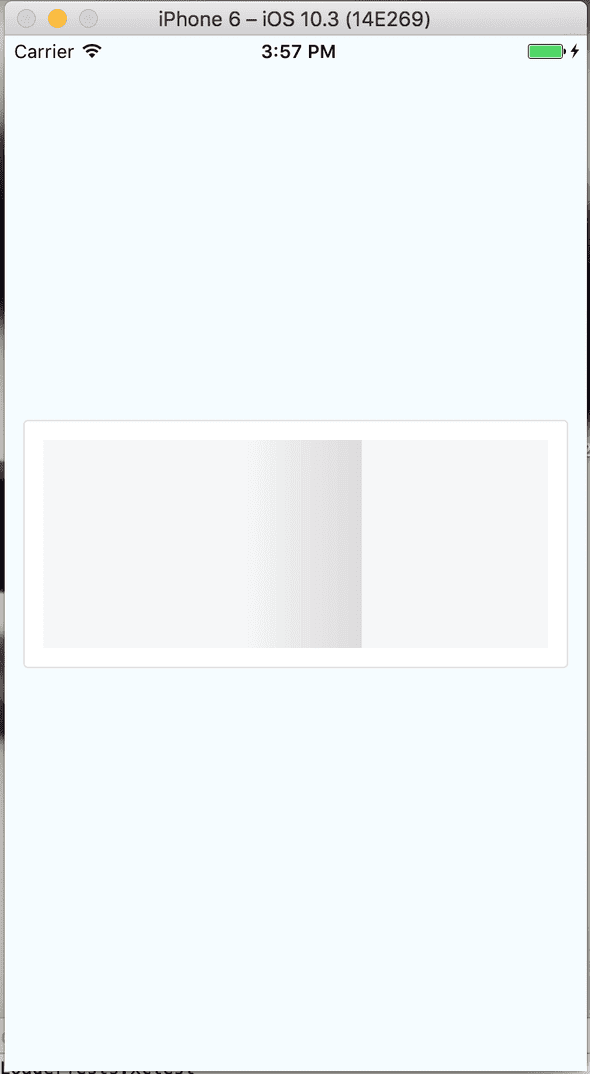
Enfin on encapsule le LinearGradient dans l’AnimatedView. Les propriétés passées au LinearGradient permettent de définir sa couleur et de définir que le dégradé soit horizontal au lieu d’être vertical. Nous avons aussi ajouter la propriété flex:1 aux style background afin de pouvoir visualiser le rendu. Nous la retirerons dès que nous ajouterons les elements représentant le contenu du post.
A ce stade vous devriez obtenir ce résultat avec l’animation en plus :
La base est définie, nous allons ajouter différentes vues avec un background blanc afin de laisser seulement certains morceaux du background apparaitre pour représenter le contenu du post.
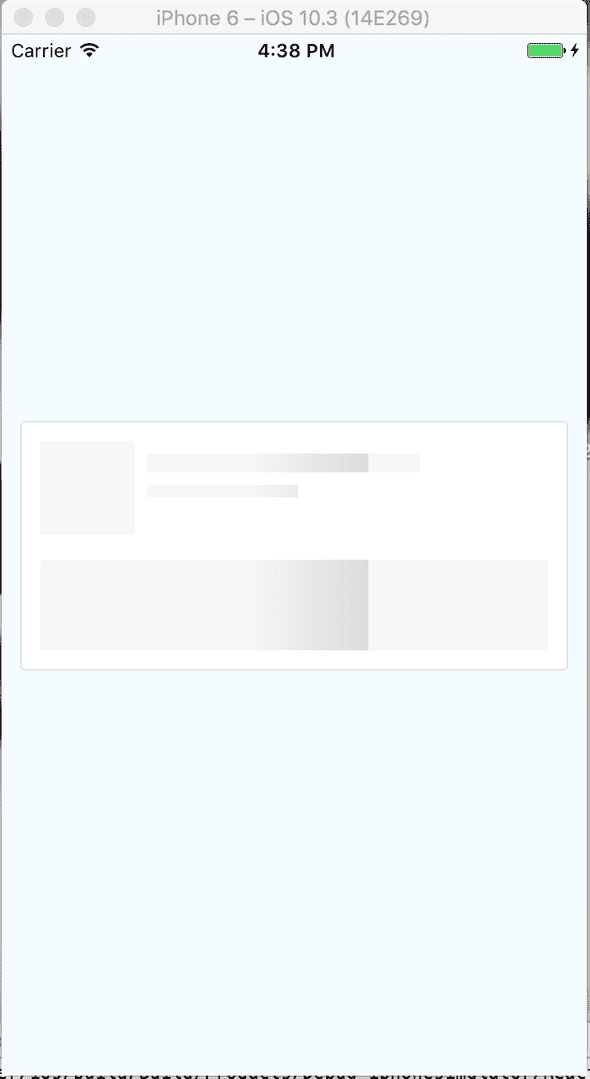
On commence par le header qui contient le placeholder de la photo de profil, le nom de l’utilisateur et la date du post.
Ajouter le code suivant juste en dessous de l’Animated.View
<View style={styles.header}>
<View style={styles.headerLineSeparator}/>
<View style={styles.headerLine}>
  <View style={{height:12,width:8,backgroundColor:'#fff'}}/>
  <View style={{height:12,width:82,backgroundColor:'#fff'}}/>
</View>
<View style={styles.headerLineSeparator}/>
<View style={styles.headerLine}>
  <View style={{height:8,width:8,backgroundColor:'#fff'}}/>
  <View style={{height:8,width:160,backgroundColor:'#fff'}}/>
</View>
<View style={{height:24,backgroundColor:'#fff'}}/>
</View>
<View style={{height:16,backgroundColor:'#fff'}}/>
et le style suivant à la suite des autres éléments de style du composant
  header:{
    marginLeft:60,
    flexDirection:'column',
  },
  headerLine:{
    justifyContent:'space-between',
    flexDirection:'row'
  },
  headerLineSeparator:{
    height:8,
    backgroundColor:'#fff'
  },
Voici le résultat :
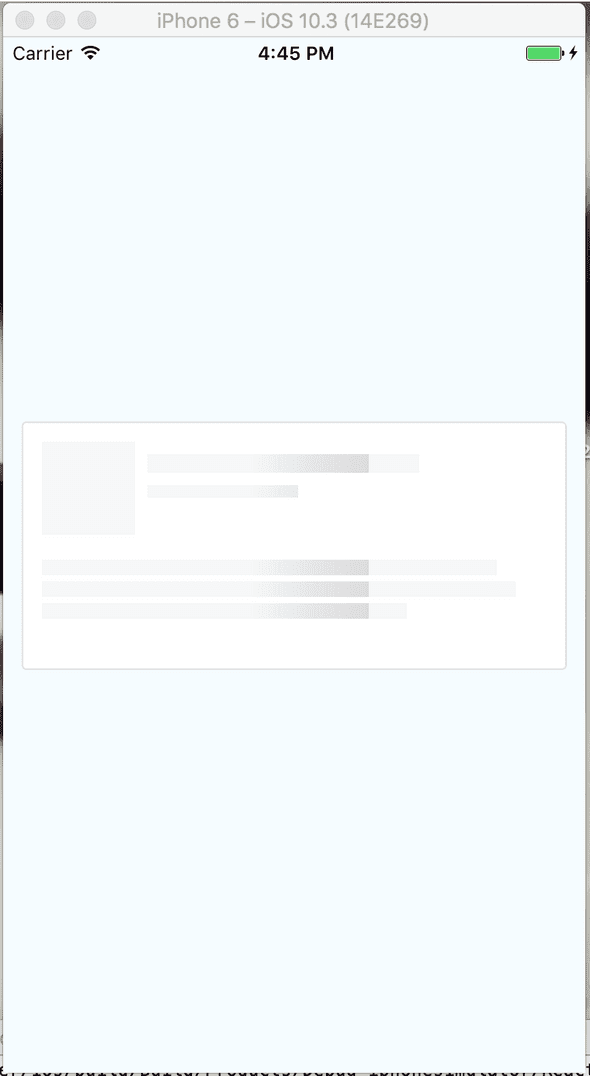
Maintenant on ajoute le placeholder représentant le contenu du post
<View style={styles.content}>
  <View style={styles.contentLine}>
    <View style={{ height: 10, width: 32, backgroundColor: '#fff' }} />
  </View>
  <View style={styles.contentLineSeperator} />
  <View style={styles.contentLine}>
    <View style={{ height: 10, width: 20, backgroundColor: '#fff' }} />
  </View>
  <View style={styles.contentLineSeperator} />
  <View style={styles.contentLine}>
    <View style={{ height: 10, width: 90, backgroundColor: '#fff' }} />
  </View>
</View>
et le style
  content:{
    flexDirection:'column',
  },
  contentLine:{
    flexDirection:'row',
    justifyContent:'flex-end'
  },
  contentLineSeperator:{
    height:4,
    backgroundColor:'#fff'
  }
On peut maintenant retirer la propriété flex:1 que nous avions ajouté dans le style background précédemment.
Nous en avons terminé avec le composant ContentPlaceHolder.
Pour finir nous allons utiliser ce composant dans une interface simulant une application avec un feed.
Dans le fichier index.js ajoutez le code suivants :
index.js
export default class ReactNativeFbLikeLoader extends Component {
  constructor(props) {
    super(props)
    const ds = new ListView.DataSource({
      rowHasChanged: (r1, r2) => r1 !== r2,
    })
    this.state = {
      ds: ds,
      dataSource: ds.cloneWithRows(data),
      isLoading: true,
    }
  }

  componentDidMount() {
    setTimeout(() => {
      this.setState({ isLoading: false })
    }, 1600)
  }

  render() {
    return (
      <View style={styles.container}>
        <View style={styles.navBar}>
          <StatusBar hidden={false} animated={true} translucent={false} barStyle="light-content" />
          <Text style={styles.title}>DWA Studio</Text>
        </View>
        {this.renderContent()}
      </View>
    )
  }

  renderContent() {
    import React, { Component } from 'react'
    import { AppRegistry, StyleSheet, Text, View, StatusBar, ListView, Image } from 'react-native'

    import ContentPlaceHolder from './components/ContentPlaceHolder'

    const data = [
      {
        first: 'casimiro araújo',
        picture: {
          thumbnail: 'https://randomuser.me/api/portraits/thumb/men/77.jpg',
        },
        post: 'Suspicio? Bene ... tunc ibimus? Quis',
        date: '07/05/2017',
      },
      {
        first: 'marie vetter',
        picture: {
          thumbnail: 'https://randomuser.me/api/portraits/thumb/women/1.jpg',
        },
        post: 'No speeches. Short speech. You lost ',
        date: '07/05/2017',
      },
      {
        first: 'denis pires',
        picture: {
          thumbnail: 'https://randomuser.me/api/portraits/thumb/men/24.jpg',
        },
        post: 'Four pounds... foooour pounds as if ',
        date: '07/05/2017',
      },
      {
        first: 'milton patterson',
        picture: {
          thumbnail: 'https://randomuser.me/api/portraits/thumb/men/45.jpg',
        },
        post: "Walter, you've been busy. You wanna",
        date: '07/05/2017',
      },
      {
        first: 'پرهام کامروا',
        picture: {
          thumbnail: 'https://randomuser.me/api/portraits/thumb/men/31.jpg',
        },
        post: 'Sorry, buddy. No can do. Pain ',
        date: '07/05/2017',
      },
      {
        first: 'jennie coleman',
        picture: {
          thumbnail: 'https://randomuser.me/api/portraits/thumb/women/76.jpg',
        },
        post: 'You are done. Fired. Do not ',
        date: '07/05/2017',
      },
      {
        first: 'alfredo wilson',
        picture: {
          thumbnail: 'https://randomuser.me/api/portraits/thumb/men/27.jpg',
        },
        post: 'Ding ding ding ding. Ding. Ding, ',
        date: '07/05/2017',
      },
      {
        first: 'david chambers',
        picture: {
          thumbnail: 'https://randomuser.me/api/portraits/thumb/men/36.jpg',
        },
        post: "Today's your lucky day. Look around, ",
        date: '07/05/2017',
      },
      {
        first: 'adam martinez',
        picture: {
          thumbnail: 'https://randomuser.me/api/portraits/thumb/men/10.jpg',
        },
        post: 'Wayfarer 515, radio check. Wayfarer ',
        date: '07/05/2017',
      },
      {
        first: 'peggy carter',
        picture: {
          thumbnail: 'https://randomuser.me/api/portraits/thumb/women/4.jpg',
        },
        post: "What's your name? Have a seat,",
        date: '07/05/2017',
      },
    ]

    if (this.state.isLoading) {
      return (
        <View style={{ padding: 8, backgroundColor: '#d1d1d1' }}>
          <ContentPlaceHolder />
          <ContentPlaceHolder />
          <ContentPlaceHolder />
          <ContentPlaceHolder />
        </View>
      )
    } else {
      return (
        <ListView
          style={{ backgroundColor: '#d1d1d1' }}
          contentContainerStyle={{ padding: 8 }}
          enableEmptySections={true}
          dataSource={this.state.dataSource}
          renderRow={rowData => this.listItem(rowData)}
        />
      )
    }
  }

  listItem(item) {
    return (
      <View style={styles.wrapper}>
        <View style={{ flexDirection: 'row' }}>
          <Image style={{ height: 60, width: 60 }} source={{ uri: item.picture.thumbnail }} />
          <View style={{ marginLeft: 12 }}>
            <Text style={{ fontSize: 16, fontWeight: 'bold' }}>{item.first}</Text>
            <Text style={{ fontSize: 10, marginTop: 8, color: '#757575' }}>{item.date}</Text>
          </View>
        </View>
        <Text style={{ marginTop: 24, fontSize: 22 }}>{item.post}</Text>
      </View>
    )
  }
}

const styles = StyleSheet.create({
  container: {
    flex: 1,
  },
  navBar: {
    justifyContent: 'center',
    alignItems: 'center',
    height: 64,
    paddingTop: 20,
    backgroundColor: '#20B2FF',
  },
  title: {
    fontSize: 17,
    letterSpacing: 0.5,
    fontWeight: '600',
    alignSelf: 'center',
    color: 'white',
  },
  wrapper: {
    height: 160,
    borderWidth: 1,
    borderRadius: 3,
    borderColor: '#dfe0e4',
    backgroundColor: '#fff',
    padding: 12,
    marginBottom: 12,
  },
})
Et voila
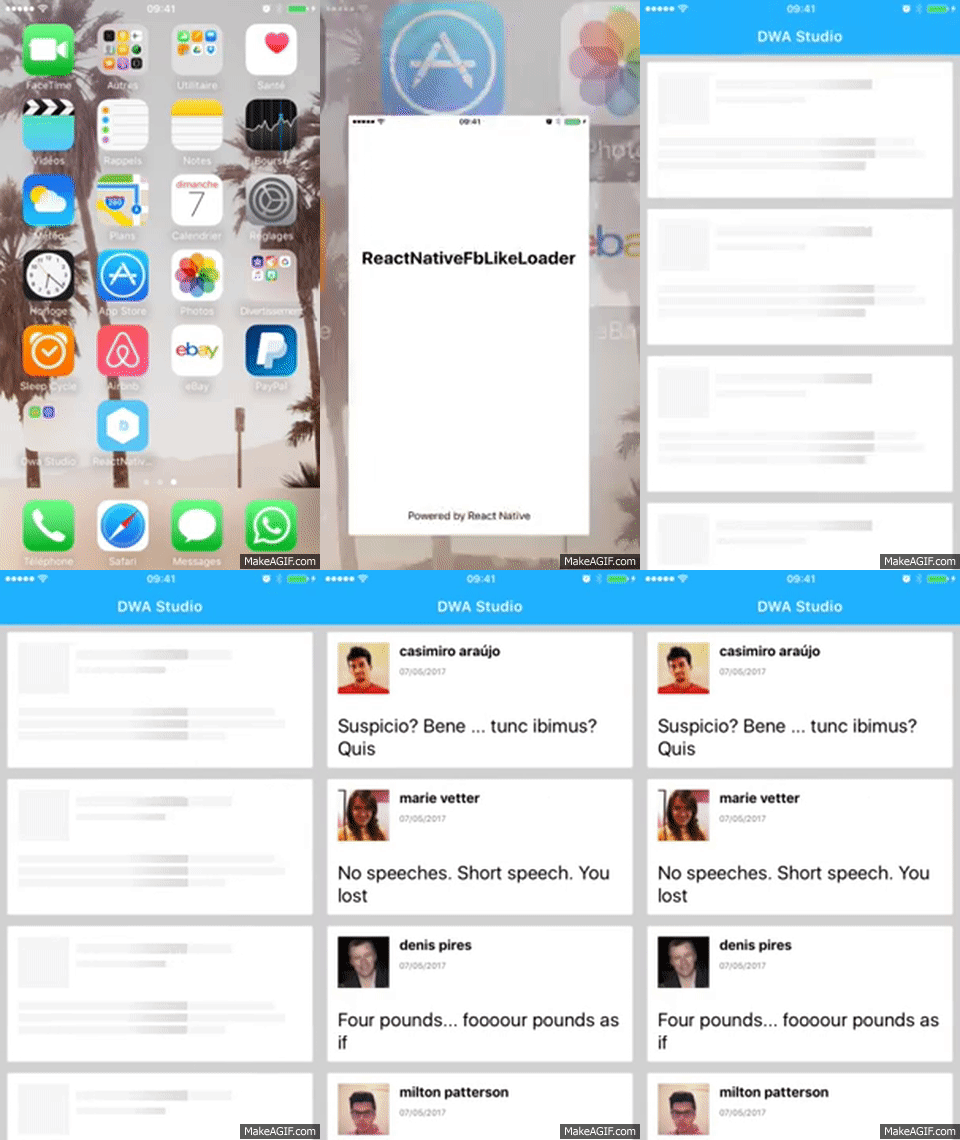
L’application est maintenant terminé, vous pouvez retrouver le code source ici

